Eat cake for breakfast is a popular saying, but we suggest you make this waffle cake and eat it for breakfast! It’s a fairly simple cake design that I decided to make with my daughter as her first introduction into cake decorating. I considered buttercream rosettes, but this waffle was way more fun!
Start by baking a square cake, in your choice of flavor. We went with chocolate cake. Bake two layers as you would normally for a small cake.
My first choice for icing would have been ganache for a smooth finish, but I had already purchased supplies to make buttercream. We made a chocolate buttercream icing for the inside of the cake, which was delicious!
We also made our own modeling chocolate, which you will need for under the fondant and the syrup. Modeling chocolate will be important for our upcoming steps because it holds its shape, and can me melted using your finger warmth.
If you don’t want to make modeling chocolate you can always buy it, but making it is much cheaper.
After all of your icings are ready, it is time to create the design. Using your iced square cake, you want to cut out small strips of modeling chocolate that will go around the outside middle edge of the cake, as shown below. Use a ruler to make this easier.

Next, you will do the same step but around the top of the cake. I suggest measuring the cake to cut the right length. Then after going around the edge, you will start to fill in the middle.


Continue making a waffle grid pattern on top of the cake until the finished product looks like this:

Once you have your modeling chocolate all attached, you can now move on to the fondant. You will want to roll your fondant out just thin enough that the grid pattern can show through. But don’t go too thin, because we will still have to use a tool to make the pattern more visible and you don’t want to poke a hole. If you do end up poking a hole in this cake, just cover it with syrup and butter!

I wanted to get distracted at this part and start to smooth the top, but don’t do that! My fondant started to dry and was harder to work with. Smooth down the sides of your cake first and then do the top! 😉 Once the fondant is on, then you can go to work with your tools to smooth down the fondant to the top of the cake. Also, don’t forget about the side. You will need to smooth your fondant down around the middle where we made a crease in the waffle, as if it had been in a waffle iron.
Once everything is smooth, it should look like this:

Now your cake is ready for some color! We got out our cake decorating airbrush and colored the cake. If you don’t have an airbrush you can also use vodka and food coloring to paint on your color. Of course using an airbrush gives you a more evened out look. This was my daughter’s first time using the airbrush!

As you can see, the airbrush gave our cakes some depth and brought out the waffle grid on the top. Since it’s food, and food has flaws you can’t do much to mess it up! I accidentally added too much color to one side of the cake, and we called it our “burnt spot”.
We let our cakes dry after airbrushing them, and then added toppings. I used modeling chocolate tinted a brownish red/orange color, like syrup, to create syrup flowing over my waffle. Make sure to roll out your modeling chocolate really thin for this part, so that it will pick up the waffle grid below.
After the syrup is on, take a tool to go around the syrup edges to flatten it and make it look more real. You can also use your fingers since they will warm up the modeling chocolate and make this easier. You will want to go over the syrup with your tool, and make sure it is in all of the grid. You will also want to paint your syrup with vodka or piping gel to give it a shine!
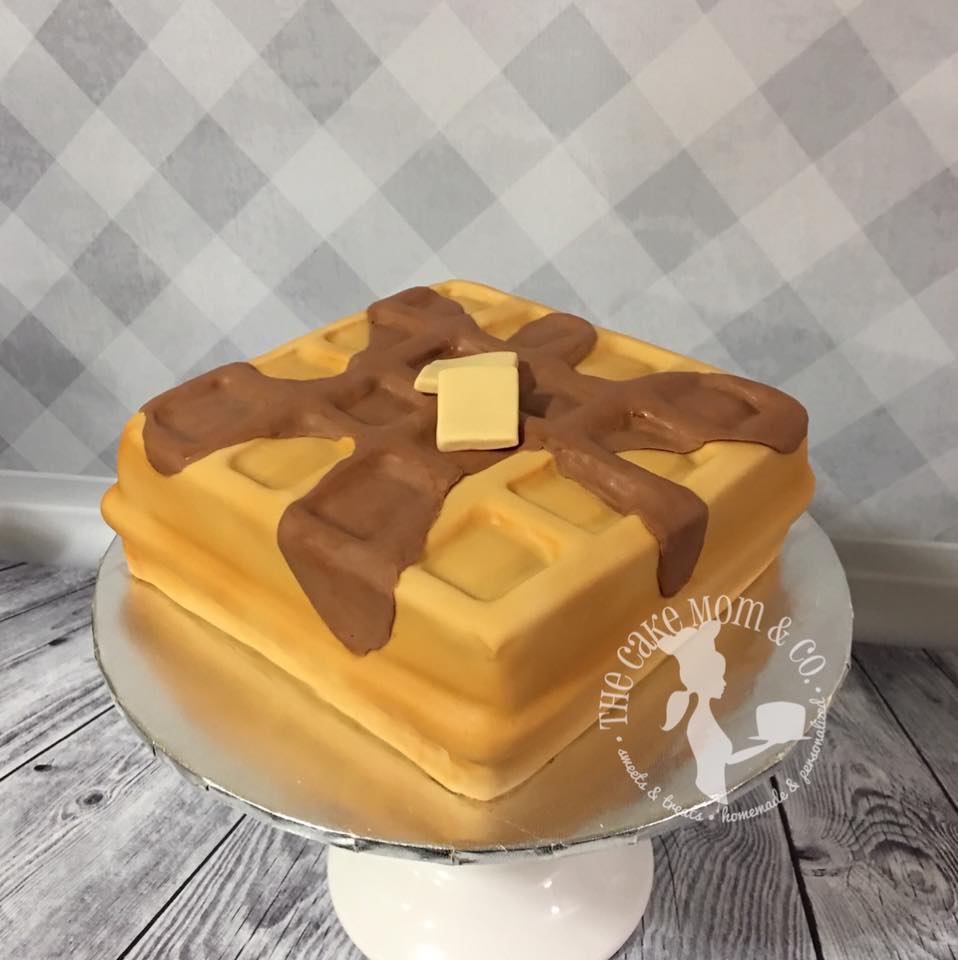
After the syrup, we added butter slabs. Those we tinted a very light tan/yellow color and did not add any shine to them because only melted butter is shiny.

Our finished waffle cakes not only looked great, but of course were delicious! My daughter opted for no syrup, just butter. She did a great job considering this was her first ever cake! She baked it all, made all of the icing, and decorated. I’m a proud cake mom!
To learn how to make this cake with a gravity defying bottle, check out Lauren Kitchen’s Craftsy class.
Gravity-Defying Cake Designs – $19.99
from: Craftsy